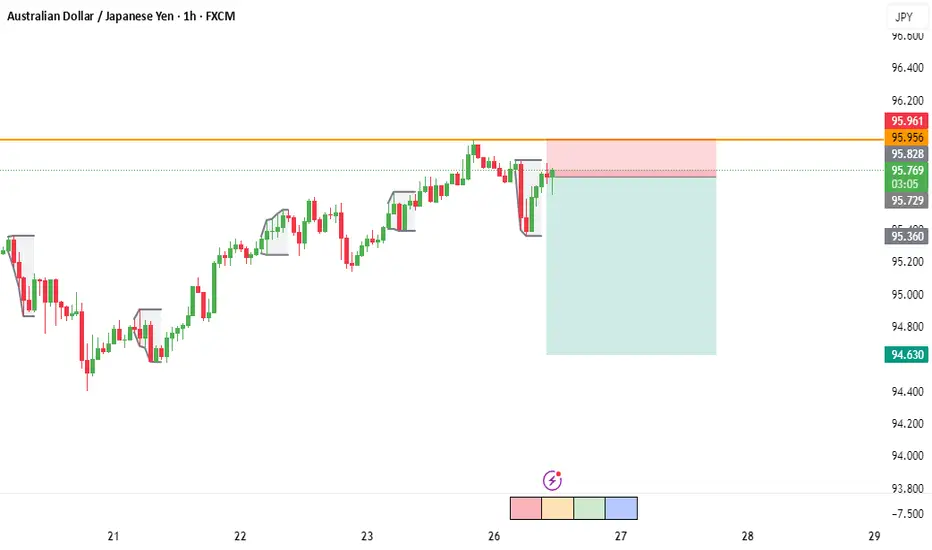
AUD/JPY is reacting strongly to a key resistance zone near 95.95 – 96.00.
The pair shows rejection wicks and a potential lower-high formation, indicating sellers stepping in.
Entry: 95.75
Stop Loss: 95.96 (above resistance)
Target: 94.63 (next demand zone)
Risk-to-Reward: ~1:5
This setup aligns with structure rejection at supply and continuation of bearish momentum.
📉 Monitoring for follow-through price action confirmation.
🔎 #AUDJPY #Forex #PriceAction #TradingView #FXAnalysis #SupplyAndDemand #ForexTrading #SwingTrade #RiskReward #JPY
Disclaimer
The information and publications are not meant to be, and do not constitute, financial, investment, trading, or other types of advice or recommendations supplied or endorsed by TradingView. Read more in the Terms of Use.
Disclaimer
The information and publications are not meant to be, and do not constitute, financial, investment, trading, or other types of advice or recommendations supplied or endorsed by TradingView. Read more in the Terms of Use.