AboBassil Swing Predictor [ROC ADX mix Composite]This indicator—AboBassil Swing Predictor —is a comprehensive multi-factor momentum model designed to highlight high-probability swing setups.
📊 Core Logic: It combines short- and long-term Rate of Change (ROC), dual-layer ADX filtering, RSI, Chaikin Money Flow (CMF), volume confirmation, squeeze zone detection (via Bollinger Bands inside Keltner Channels), and inside bar breakout logic to create actionable entry conditions.
= Highlights:
- Green/purple/red background flags ROC crossover and squeeze zones
- Dynamic plots for ROC, ADX, and RSI to observe trend and signal alignment
- Entry signal arrows (bullish/bearish) based on strict composite conditions
- Real-time visual composite score to track strength and bias
- Clearly marked levels for RSI (30, 50, 70) and ADX threshold
= Best used as a decision-support tool for swing traders momentum setups. Fine-tuned to filter noisy signals and focus only when multiple forces align.
please send me if you suggest some tweak or a specific strategy improvements ,
Indicators and strategies

Adaptive Cycle Oscillator with EMADescription of the Adaptive Cycle Oscillator with EMA Pine Script
This Pine Script, titled "Adaptive Cycle Oscillator with EMA", is a custom technical indicator designed for TradingView to help traders analyze market cycles and identify potential buy or sell opportunities. It combines an Adaptive Cycle Oscillator (ACO) with multiple Exponential Moving Averages (EMAs), displayed as colorful, wavy lines, and includes features like buy/sell signals and divergence detection. Below is a beginner-friendly explanation of how the script works, adhering to TradingView's Script Publishing Rules.
What This Indicator Does
The Adaptive Cycle Oscillator with EMA helps you:
Visualize market cycles using an oscillator that adapts to price movements.
Track trends with seven EMAs of different lengths, plotted as a rainbow of wavy lines.
Identify potential buy or sell signals when the oscillator crosses predefined thresholds.
Spot divergences between the oscillator and price to anticipate reversals.
Use customizable settings to adjust the indicator to your trading style.
Note: This is a technical analysis tool and does not guarantee profits. Always combine it with other analysis methods and practice risk management.
Step-by-Step Explanation for New Users
1. Understanding the Indicator
Adaptive Cycle Oscillator (ACO): The ACO analyzes price data (based on high, low, and close prices, or HLC3) to detect market cycles. It smooths price movements to create an oscillator that swings between overbought and oversold levels.
EMAs: Seven EMAs of different lengths are applied to the ACO and scaled based on the market's dominant cycle. These EMAs are plotted as colorful, wavy lines to show trend direction.
Buy/Sell Signals: The script generates signals when the ACO crosses above or below user-defined thresholds, indicating potential entry or exit points.
Divergence Detection: The script identifies bullish or bearish divergences between the ACO and the fastest EMA, which may signal potential reversals.
Visual Style: The indicator uses a rainbow of seven colors (red, orange, yellow, green, blue, indigo, violet) for the EMAs, with wavy lines for a unique visual effect. Static levels (zero, overbought, oversold) are also wavy for consistency.
2. How to Add the Indicator to Your Chart
Open TradingView and load the chart of any asset (e.g., stock, forex, crypto).
Click on the Indicators button at the top of the chart.
Search for "Adaptive Cycle Oscillator with EMA" (or paste the script into TradingView’s Pine Editor if you have access to it).
Click to add the indicator to your chart. It will appear in a separate panel below the price chart.
3. Customizing the Indicator
The script offers several input options to tailor it to your needs:
Base Cycle Length (Default: 20): Sets the initial period for calculating the dominant cycle. Higher values make the indicator slower; lower values make it more sensitive.
Alpha Smoothing (Default: 0.07): Controls how much the ACO smooths price data. Smaller values produce smoother results.
Show Buy/Sell Signals (Default: True): Toggle to display green triangles (buy) and red triangles (sell) on the chart.
Threshold (Default: 0.0): Defines overbought (above threshold) and oversold (below threshold) levels. Adjust to widen or narrow signal zones.
EMA Base Length (Default: 10): Sets the starting length for the fastest EMA. Other EMAs are incrementally longer (12, 14, 16, etc.).
Divergence Lookback (Default: 14): Determines how far back the script looks to detect divergences.
To adjust these:
Right-click the indicator on your chart and select Settings.
Modify the inputs in the pop-up window.
Click OK to apply changes.
4. Reading the Indicator
Oscillator and EMAs: The ACO and seven EMAs are plotted in a separate panel. The EMAs (colored lines) move in a wavy pattern:
Red (fastest) to Violet (slowest) represent different response speeds.
When the faster EMAs (e.g., red, orange) are above slower ones (e.g., blue, violet), it suggests bullish momentum, and vice versa.
Zero Line: A gray wavy line at zero acts as a neutral level. The ACO above zero indicates bullish conditions; below zero indicates bearish conditions.
Overbought/Oversold Lines: Red (overbought) and green (oversold) wavy lines mark threshold levels. Extreme ACO values near these lines may suggest reversals.
Buy/Sell Signals:
Green Triangle (Bottom): Appears when the ACO crosses above the oversold threshold, suggesting a potential buy.
Red Triangle (Top): Appears when the ACO crosses below the overbought threshold, suggesting a potential sell.
Divergences:
Green Triangle (Bottom): Indicates a bullish divergence (price makes a lower low, but the EMA makes a higher low), hinting at a potential upward reversal.
Red Triangle (Top): Indicates a bearish divergence (price makes a higher high, but the EMA makes a lower high), hinting at a potential downward reversal.
5. Using Alerts
You can set alerts for key events:
Right-click the indicator and select Add Alert.
Choose a condition (e.g., "ACO Buy Signal", "Bullish Divergence").
Configure the alert settings (e.g., notify via email, app, or pop-up).
Click Create to activate the alert.
Available alert conditions:
ACO Buy Signal: When the ACO crosses above the oversold threshold.
ACO Sell Signal: When the ACO crosses below the overbought threshold.
Bullish Divergence: When a potential upward reversal is detected.
Bearish Divergence: When a potential downward reversal is detected.
6. Tips for Using the Indicator
Combine with Other Tools: Use the indicator alongside support/resistance levels, candlestick patterns, or other indicators (e.g., RSI, MACD) for confirmation.
Test on Different Timeframes: The indicator works on any timeframe (e.g., 1-minute, daily). Shorter timeframes may produce more signals but with more noise.
Practice Risk Management: Never rely solely on this indicator. Set stop-losses and position sizes to manage risk.
Backtest First: Use TradingView’s Strategy Tester (if you convert the script to a strategy) to evaluate performance on historical data.
Compliance with TradingView’s Script Publishing Rules
This description adheres to TradingView’s Script Publishing Rules (as outlined in the provided link):
No Performance Claims: The description avoids promising profits or specific results, emphasizing that the indicator is a tool for analysis.
Clear Instructions: It provides step-by-step guidance for adding, customizing, and using the indicator.
Risk Disclaimer: It notes that trading involves risks and the indicator should be used with other analysis methods.
No Misleading Terms: Terms like “buy” and “sell” are used to describe signals, not guaranteed actions.
Transparency: The description explains the indicator’s components (ACO, EMAs, signals, divergences) without exaggerating its capabilities.
No External Links: The description avoids linking to external resources or soliciting users.
Educational Tone: It focuses on educating users about the indicator’s functionality.
Limitations
Not a Standalone System: The indicator is not a complete trading strategy. It provides insights but requires additional analysis.
Lagging Nature: As with most oscillators and EMAs, signals may lag behind price movements, especially in fast markets.
False Signals: Signals and divergences may not always lead to successful trades, particularly in choppy markets.
Market Dependency: Performance varies across assets and market conditions (e.g., trending vs. ranging markets).

Dynamic RSI with Volatility-Based Levels)Dynamic RSI with Volatility-Based Levels is a smarter version of the classic RSI. Instead of using fixed overbought (70) and oversold (30) levels, this indicator adjusts the thresholds based on market volatility, using ATR as the reference.
📊 How it works:
The more volatile the market, the wider the RSI bands become.
In calm markets, the thresholds tighten to capture more sensitive reversals.
This helps reduce false signals during strong trends or erratic price moves.
✅ Features:
RSI with adjustable period
Volatility measured using ATR (% of price)
Dynamic overbought and oversold zones
Optional background highlights for extreme zones
🔍 Use cases:
Identify more reliable reversal zones in volatile markets
Avoid overreacting to RSI overbought/oversold in high-volatility phases
Use dynamic thresholds to refine entries and exits in momentum strategies

ATR Screener with Labels and ShapesWeekly Daily ATR Pine Scanner
To find out tightness or contraction in a stock we needs to check if volatality is decreasing as well as compared to previous 14 or 10 bars volatility . we check this for weekly and then for Daily , so that we can enter in a stock which is tightest in recent times.
Condition is :
1. Weekly Candle ATR x 0.8 < 10 Week ATR
2. Daily Candle ATR x 0.6 < 14 Day ATR
When both of the conditions are met then they signifies that the stock has tightened in weekly and daily aswell . so now we can find ways to enter during max squeeze.
How to scan in Pine Scanner ?
FIrst add indicator as favourite and Go to pine scanner page in trading view and then scan your watchlist and there you will see 3 columns 1 with only Weekly conditions met , 2 with only Daily and 3rd with Both conditions met .
Select stocks and move to new watchlist and now you have those stocks which has contracted the most in recent times .

RSI Divergence by BAPI MONDALPure RSI Divergence indicator which tells you in the chart buy and sell position immediately

SHYY-TFC-Horizontal V2SHYY-TFC-Horizontal V2 – Multi-Timeframe Clarity for The Strat Traders
SHYY-TFC-Horizontal V2 is a powerful, clean, and efficient overlay designed for serious traders who use Rob Smith’s The Strat.
This real-time table gives you instant visual insight across all key timeframes – from 5 minutes to monthly – with:
Candle direction (bullish, bearish, neutral)
Strat bar type (1, 2U, 2D, 3)
Live countdown to bar close
Compact horizontal layout that saves space and enhances clarity
Fully customizable table position to fit any chart setup
Built with no lookahead bias, this version meets TradingView’s script publishing standards and is optimized for actionable, real-time decisions.
Ideal for:
Scalpers who need fast confirmation
Swing traders aligning entries with time frame continuity
Price action traders following The Strat methodology
Trade with confidence. See the full picture. React faster.
SHYY-TFC-Horizontal V2 – built to make you faster, sharper, and more in control.

VWAP Rejection Strategy XAUUSDhi made this strategy of vwap rejection as iam a personally a big fan of vwap this strategy works on any tf and its best suited for xauusd..

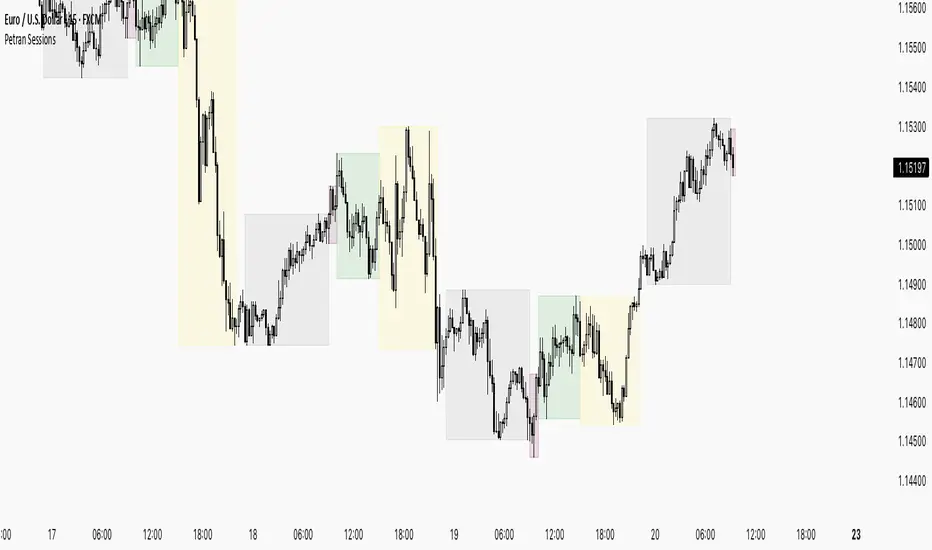
Sessions By petranThis indicator highlights the key trading sessions on the chart: Asian, Frankfurt, London, and New York. It helps traders visually track when each session begins and ends, making it easier to analyze price action, volume, and volatility during specific times of the day.
Key features:
Customizable session start and end times
Up to 4 major sessions highlighted
Best used on intraday timeframes (1-minute to 1-hour)
Clean, minimal design with adjustable colors and transparency
No repainting – reliable for both live trading and backtesting
Ideal for intraday traders and anyone who wants to better understand market dynamics during different trading sessions.
Pi Cycle Top (Overlay)EN – A minimal Pi-Cycle Top overlay. When the 111-day SMA crosses above the 350-day SMA × 2 it flashes a red warning. All four historical signals caught the cycle top within ±3 days. Includes on-chart lines, triangle markers, optional background highlight, alertcondition, and fully adjustable lengths. Your built-in market airbag for BTC. 🚀
中文 – 超简洁的 Pi Cycle 顶部指标:111 日均线上穿 350 日均线×2 即触发红色警报,历史 4 次均在牛市顶前后 3 天内命中。脚本叠加于主图,提供均线、三角标记、可选背景高亮与预警条件,参数可自定义。把这只“安全气囊”装进每一张 BTC 图表。

SMA Cross - Multi-Timeframe Presets Crypto onlyA Smart Moving Average Crossover System for Crypto Trading
🔹 Overview
This indicator detects Golden Cross (bullish) and Death Cross (bearish) signals using customizable SMA periods optimized for different timeframes (15m, 1h, 4h/Daily). It helps traders identify trend reversals early while reducing false signals with intelligent SMA presets.
📊 Key Features
1️⃣ Optimized SMA Presets for Different Timeframes
15m Charts: 15x40 (Fast reaction to intraday moves)
1h Charts: 20x50 (Balanced for swing trading)
4h/Daily Charts: 30x100 (Reduces noise in higher timeframes)
Custom Mode: Manually set any SMA values
2️⃣ Clear & Intuitive Signals
Golden Cross (Bullish): ▲ Green arrow (below price) or "GOLDEN CROSS" label
Death Cross (Bearish): ▼ Red arrow (above price) or "DEATH CROSS" label
3️⃣ Flexible Display Options
Labels: Text-based signals (clean & descriptive)
Arrows: Visual icons (minimalist & chart-friendly)
None: Only shows SMAs (for manual analysis)
4️⃣ Customizable for Any Market Condition
Adjust SMAs manually if needed (e.g., wider SMAs for volatile markets).
Works on any cryptocurrency or asset (BTC, ETH, stocks, forex).
🎯 Trading Applications
✔ Trend Identification:
Golden Cross → Uptrend likely starting
Death Cross → Downtrend likely starting
✔ Entry/Exit Signals:
Go long after a Golden Cross (if confirmed by volume/RSI)
Go short/exit after a Death Cross
✔ Filter for Higher Timeframes:
Use 4h/Daily SMAs to confirm trends before trading on 15m/1h.
⚙️ How to Use It?
Apply the indicator to your chart.
Select the matching preset (15m, 1h, 4h/Daily).
Watch for cross signals (arrows/labels).
Combine with other indicators (RSI, Volume, MACD) for confirmation.
📌 Pro Tip
Backtest first! Not all crosses lead to strong trends.
Works best in trending markets (avoid using in choppy/ranging conditions).

CypherB Money Flow (Approximation)Just a quick and dirty script to estimate money for from CipherB free.

Customizable RSI Multi-Timeframe Table (4-Color, Up to 15)Used Claude to tweak @JacekA's script to allow options for where users may want to position the table

Multi Symbol RSI Monitor (Miu)This script is built for traders who monitor a large number of assets and need a fast, clear way to identify overbought or oversold conditions using the RSI (Relative Strength Index).
With support for up to 40 user-defined symbols, the Multi Symbol RSI Monitor displays a real-time RSI dashboard directly on the chart, highlighting key signals and enabling alert-based monitoring — perfect for multi-asset or multi-screen setups.
What it does:
- Calculates the RSI (default 14 periods) for up to 40 customizable symbols.
- Displays RSI values in a clean, adjustable table overlay, color-coded based on overbought/oversold thresholds.
- Optionally shows live prices next to each symbol’s RSI.
- Triggers real-time alerts when RSI crosses above or below defined thresholds.
Key Features:
- Monitor up to 40 assets simultaneously.
- Color-coded alerts in the table:
- Red for overbought (RSI > 70)
- Green for oversold (RSI < 30)
- Fully customizable layout:
- Column width
- Table position on screen
- Toggle price column
- Alert system works even when the script is not visible on the active chart.
- Enable/disable any symbol independently.
How to use:
1) Add the indicator to your chart.
2) Open the settings menu:
- Choose your 40 preferred symbols.
- Set RSI length and overbought/oversold levels.
- Toggle price display and table position.
3) Click “Create Alert” to configure alerts per your strategy.
4) When triggered, you’ll receive alert messages like:
- ▲ ETH | RSI 70 | 3462.15
- ▼ DOGE | RSI 30 | 0.1256
Technical Note:
This script uses request.security() to fetch RSI, price, and tick size data in real time for each selected symbol. Custom alerts are generated for each RSI crossover event.
Feedback and suggestions are welcome!
If you find this tool helpful, feel free to leave a comment or a thumbs up.
Enjoy!

CST WITH ATR Custom Multiplier @ DrGSthis is the revised and updated version onf contra trend in ST with ATR of 5 and 3x multiplier. it works on the principle of selling when everyone is buying and vice versa. last modified on 20 june by Dr GS

Rolling VWAP: 30D & 365DThis TradingView Pine Script calculates and plots two Rolling Volume Weighted Average Price (VWAP) lines:
30-Day Rolling VWAP (Blue): Shows the average price over the past 30 daily candles, weighted by volume.
365-Day Rolling VWAP (Orange): Shows the long-term average price over the past 365 daily candles, also volume-weighted.
Unlike standard VWAP (which resets daily or per session), these are rolling averages, helping identify longer-term price trends and value zones.
An optional histogram can be enabled to visualize the difference between the 30D and 365D VWAP, turning green when short-term is above long-term (bullish) and red when it's below (bearish).

豪豪均//@version=5
indicator("豪豪均", overlay=true)
// 偵測新的一天開盤
isNewDay = ta.change(time("D")) != 0
// 宣告變數儲存 VWAP 計算資料
var float cumPV = na // 價格 * 量 累積
var float cumVol = na // 成交量累積
// 每天重新初始化
if isNewDay
cumPV := hlc3 * volume
cumVol := volume
else
cumPV += hlc3 * volume
cumVol += volume
vwapToday = cumPV / cumVol
plot(vwapToday, title="當日 VWAP", color=color.orange, linewidth=2)

SET Buy/Sell Signal (MACD + RSI + MA)📈 SET Buy/Sell Signal (MACD + RSI + Trend Filter)
An intelligent trading tool for Thai stock investors who want clear and reliable buy/sell signals. Designed specifically for SET stocks, this indicator combines three popular and proven technical tools:
🔍 What It Uses:
✅ MACD Crossover: Captures momentum shifts with fast/slow EMA crossovers
✅ RSI Filter: Avoids buying when the market is overbought or selling when oversold
✅ Trend Confirmation (MA): Confirms signals only when price is aligned with the broader trend
📊 How It Works:
BUY Signal appears when:
MACD crosses above its signal line
RSI is below 70 (not overbought)
Price is above the 50-period moving average (uptrend confirmation)
SELL Signal appears when:
MACD crosses below its signal line
RSI is above 30 (not oversold)
Price is below the 50-period moving average (downtrend confirmation)
📌 Features:
Visual buy/sell markers on chart
Adjustable parameters for MACD, RSI, and MA
Clean integration for swing or trend traders on the Thai stock market (SET)

Volume Weighted Regression ChannelThis indicator constructs a volume-weighted linear regression channel over a custom time range.
It’s conceptually similar to a Volume Profile, but instead of projecting horizontal value zones, it builds a tilted trend channel that reflects both price direction and volume concentration.
🧠 Core Features:
Volume-weighted points: Each candle contributes to the regression line proportionally to its volume — heavier candles shift the channel toward high-activity price zones.
Linear regression line: Shows the trend direction within the selected time interval.
±σ boundaries: Outer bands represent the standard deviation of price (also volume-weighted), highlighting statistical dispersion.
Fully customizable: Adjustable line styles, widths, and channel width (sigma multiplier).
Time window control: Select any start and end time to define the regression interval.
📊 Why use this instead of Volume Profile?
While Volume Profile shows horizontal distributions of traded volume, this indicator is ideal when:
You want to understand how volume clusters affect trend direction, not just price levels.
You're analyzing time-dependent flow rather than static price zones.
You're looking for a dynamic volume-adjusted channel that moves with the market's structure.
It’s especially useful in identifying volume-supported trends, hidden pullback zones, and statistical extremes.
⚙️ Notes:
Works on any timeframe and instrument.
Does not repaint.
Does not require volume profile data feeds — uses standard volume and hl2.

Last 2 Days Key Levels (Historical)Last 2 Days Key Levels (Historical)
By MercaderoAI & Cesar Castro
This indicator is designed to automatically identify and plot the key price levels that professional and retail traders watch every day. By visualizing these levels directly on your chart, you can get a clear view of potential support and resistance zones, helping you make more informed trading decisions.
The script is highly customizable and robust, designed to work reliably in both live market conditions and TradingView's Bar Replay mode.
What This Indicator Does
The indicator plots two main categories of levels:
1. Real-Time Levels (Current Day Only):
These levels form and update live during the current day's premarket session and remain on the chart for the entire trading day.
Premarket High (PMH): The highest price reached during the current day's premarket session (04:00 - 09:29 ET).
Premarket Low (PML): The lowest price reached during the current day's premarket session.
2. Historical Levels (Drawn for Previous Days):
These levels are calculated from previous trading sessions and provide historical context for potential price reactions.
Prior Day Levels:
High (PDH)
Low (PDL)
Mid-Point (PDM)
Pivot (PDP)
2-Day Prior Levels:
High (PDH2)
Low (PDL2)
Mid-Point (PDM2)
Pivot (PDP2)
How to Use This Indicator
Support and Resistance: The core function of these levels is to act as potential support and resistance. Watch for price to react at these levels. A strong bounce off a key level might indicate a reversal, while a clean break through it could signal a continuation of the current trend.
Confirmation Signals: Use these levels to confirm your trading ideas. For example, a break and successful retest of the Prior Day High (PDH) can be a strong bullish confirmation signal. Conversely, a break and retest of the Prior Day Low (PDL) can be a bearish signal.
Intraday Price Magnets: The Mid-Point (PDM) and Pivot (PDP) levels often act as "magnets" for price during the trading day, with price frequently revisiting these areas.
Context for Strength: The levels from two days prior (PDH2, PDL2, etc.) can provide additional context for stronger, more established areas of support or resistance that may have been respected over multiple sessions.
Customization and Settings
The indicator is fully customizable to fit your trading style and chart layout.
On-Chart Label Settings:
Label Color: Choose the color for the text labels (e.g., "PDH", "PML").
Label Size: Adjust the size of the on-chart labels from tiny to huge.
Level-Specific Settings (Premarket, Prior Day, 2-Day Prior):
Toggle Visibility: You can turn any individual level on or off (e.g., show the PDH but hide the PDM).
Color: Customize the color for each line. The 2-Day Prior levels also have a transparency setting.
Line Style: Choose between Solid, Dotted, or Dashed lines.
Line Width: Adjust the thickness of the lines.
General Settings:
Days of History: This powerful setting lets you choose how many days of historical lines you want to see on your chart (from 1 to 6).
IMPORTANT
For this indicator to calculate the Premarket High and Low correctly, you MUST have Extended Trading Hours enabled on your chart. You can find this option in your chart's settings.

RSI Pullback Signal (Confirmed Logic)Indicator used for XAUUSD pullback strategy . Waiting for price on RSI to go past the 30 or 70 then come back through the 30 or 70 then pullback to give me an opportunity to buy or sell .

Opening Range Breakout - India Market [UkutaLabs]█ OVERVIEW
** This script was designed to work specifically with the India Markets
The Opening Range Breakout is a powerful trading tool that indicates a strong range based on the high and low of the first fifteen or thirty minutes after market open. This range serves as a potential area of Support or Resistance that traders should be aware of during their trading. Because of this, the Opening Range Breakout is a versatile trading tool that can be included in a wide variety of trading strategies.
The aim of this script is to simplify the trading experience of users by automatically identifying and displaying price levels that they should be aware of.
█ USAGE
When the India Market opens each day, the script will automatically identify and label the opening range in real time. The user can control whether the script measures the first 15 or 30 minutes of each trading day to fit each trader’s trading style.
Because there tends to be a spike in volume during this period, the range that is identified can serve as a powerful indication of overall market strength. Once the price breaks out of this range, it then can be used as an area of support or resistance depending on the direction of the breakout.
█ SETTINGS
Configuration
• Display Mode: Determines the number of days the script should load.
• Apply DST: Adjusts the opening to Daylight Savings Time.
Label Settings
• Show Labels: Determines whether labels are drawn within the range.
• Label Size: Determines the size of font for the labels.
• Label Alignment: Determines the font alignment for the labels.
Line Settings
• Line Width: Determines the thickness of the lines.
• Label Style: Determines the style to draw the lines.
Range Settings
• 15 Minute: Determines whether or not the 15 minute range is drawn.
• 15 Minute Color: Determines the color of the 15 minute range and labels.
• 30 Minute: Determines whether or not the 30 minute range is drawn.
• 30 Minute Color: Determines the color of the 30 minute range and labels.

DJ30 Sniper (Trend + Reversal Buy + Pyramid Recovery)
4Hours chart only ,have fun people, don't forget to leave review if you like it

MA Cross with 5‑MA Exit (15m Chart)entry on 9 ma over 21 15m chart exit when price closes below 5 ma
