Goldfinch_song
PremiumALGO has completed its first local move and is now retracing toward key support levels. The price remains under the 200DMA and is heading into the first cluster of demand zones. Step-by-Step Price Scenario: Initial Support: Watch the 0.2413–0.2268 zone — this is the first area to scale in spot buys. Main Accumulation: If price drops deeper, the main spot buy...
From a monthly perspective, CRYPTOCAP:USDT.D is showing a textbook bearish descending triangle at the top — right after a decade-long uptrend. Price has repeatedly failed to break above resistance, forming a series of lower highs and consistent support. Scenario: If the support gives way and this pattern confirms, we could see a multi-year unwind, with the...
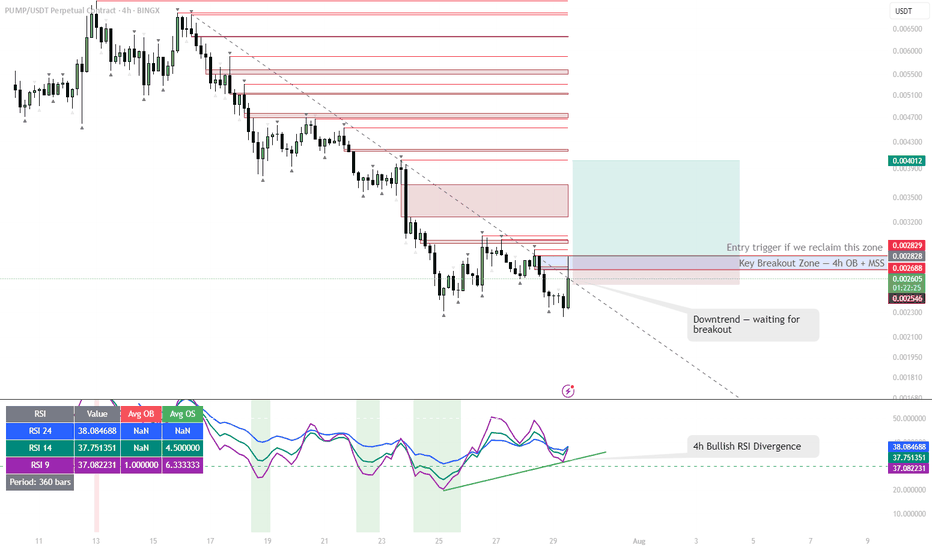
Early signals for a reversal, but not rushing in. Some clear bullish divergence on the 4h RSI — first positive sign after an extended downtrend. Price can pop from here, but my plan is to wait for a break and hold above the 4h Order Block + MSS zone (red box) before taking any long entry. Confirmation is key — I only want to get involved if we reclaim this area...
Started building a position around 42.7 due to the under/over of the H4 EMA 200 and the prior consolidation high. However, there's an untapped H4 demand zone beneath — if we get a flush into that area and then reclaim 41.2 and the H4 EMA 200, I'll be adding to my position. Invalidation: Losing the H4 demand would be my cut-off, potentially opening the door for a...
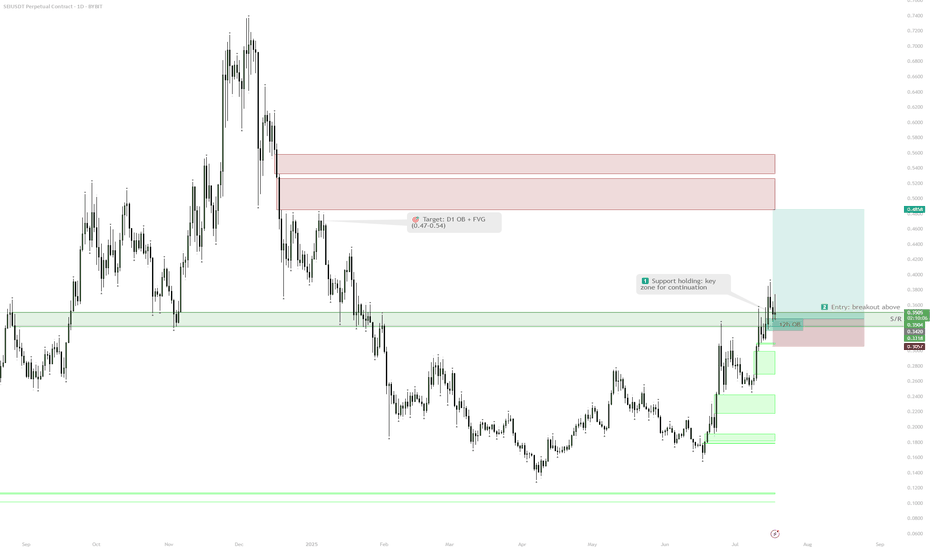
1. Support 0.33–0.36 holding 2. Entry after SR breakout 3. Target: D1 OB 0.47–0.54 4. Stop below 0.33
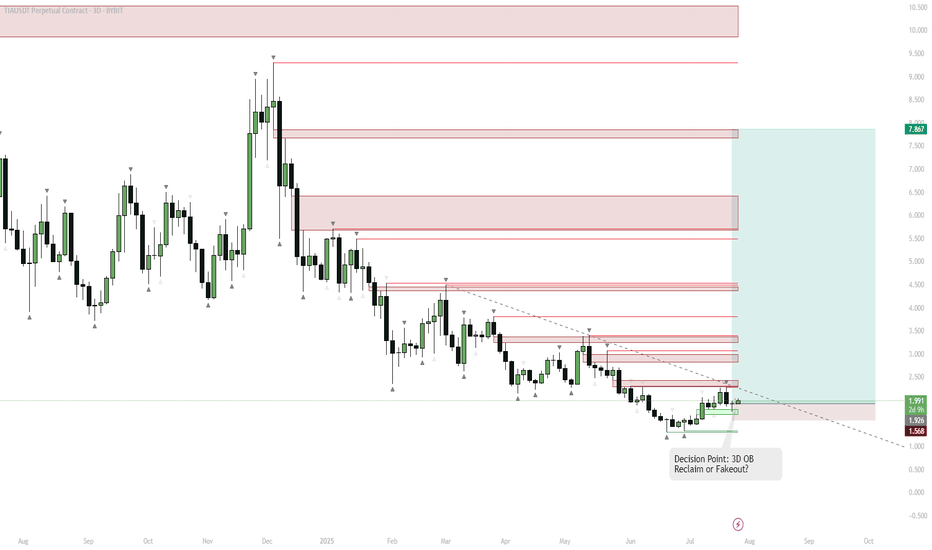
Key Observation LSE:TIA has been in a prolonged downtrend, with a recent strong bounce from multi-month support (highlighted green). Multiple supply zones (red) are stacked above, representing resistance. Swing Short Context Despite the bounce, the asset has a history of fakeouts and failed breakouts ("cursed asset"). A classic "10/10 top/bottom" pattern...
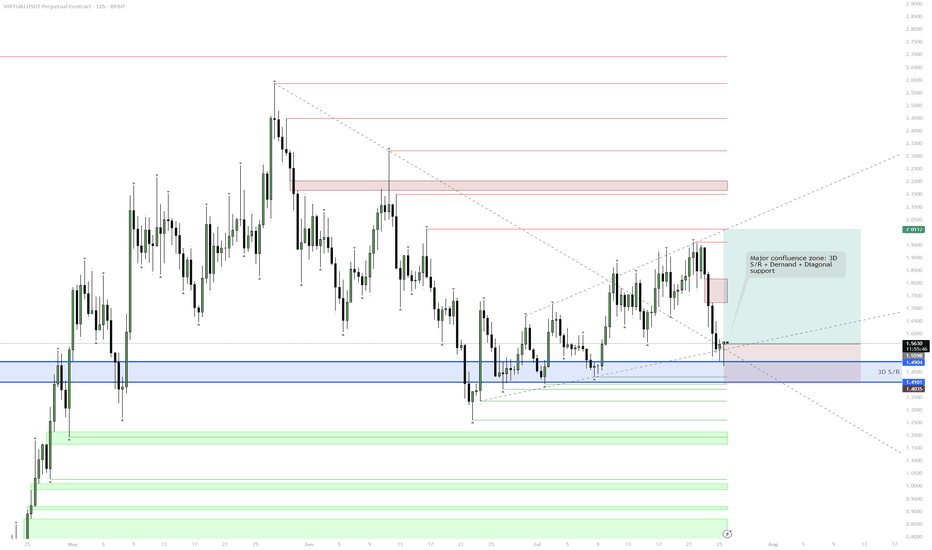
Entry into 3D S/R and Demand Zone (Blue Box) The current price action is testing a key 3D support/resistance level, which aligns with a historical demand zone. Multiple diagonal supports converge here, making it a high-probability zone for a reaction. Accumulation & Reversal Play The setup suggests that this zone is ideal for building a position. Expect...
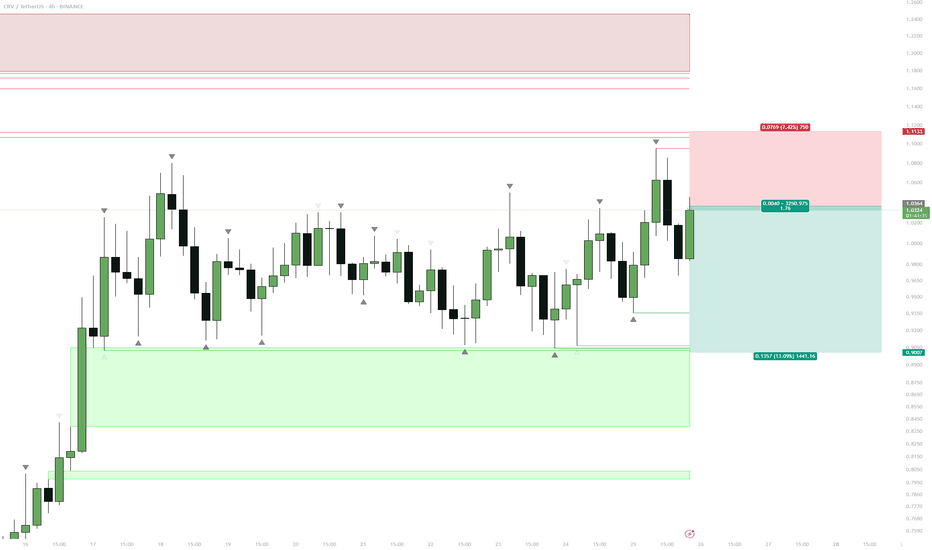
Extended Range CRV has been ranging for almost week with no clear direction. Price has respected resistance above $1.10 multiple times. Obvious Liquidity Pool Multiple equal lows are sitting at the $0.90 level, a textbook liquidity magnet. Market makers are likely to target this area before any substantial move higher. Short Entry Short from just above...
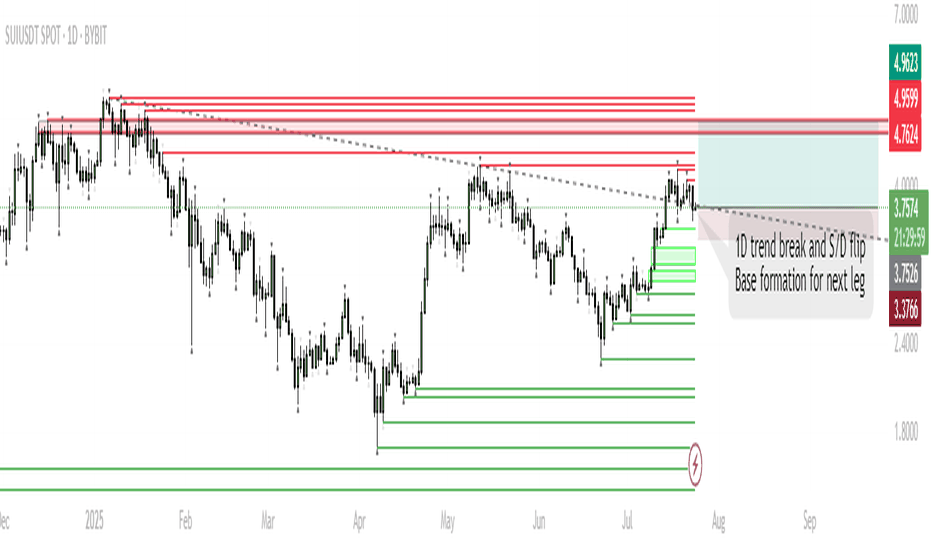
Trend Shift: SUI has broken the 1D downtrend and is now consolidating above a key supply/demand zone, suggesting accumulation. Short-Term Range: Expect ranging/chop as price tests acceptance above broken resistance. This phase could last up to a week. Trigger for Next Move: Sustained closes above $4.0 will signal buyers are in control, opening the way for a move...
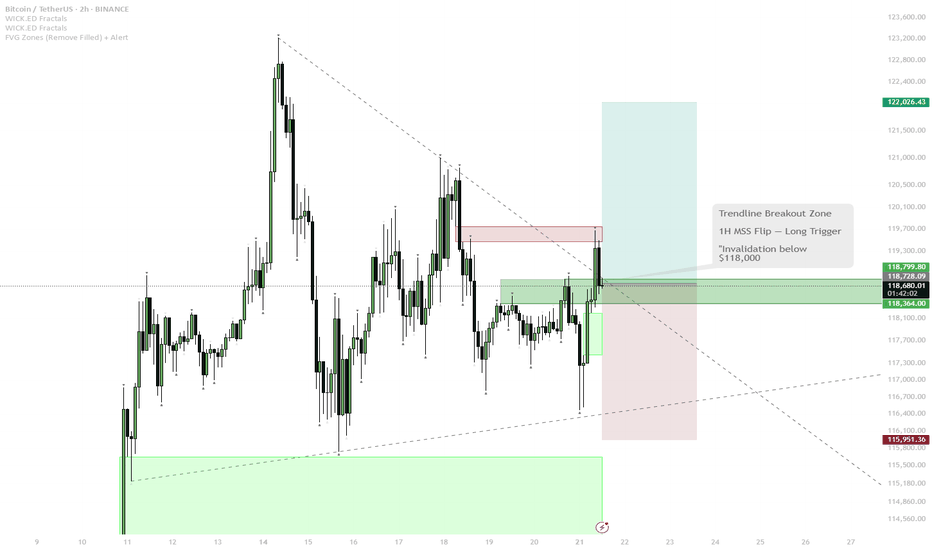
BTC has bounced from local support (green zone) and is challenging the descending trendline. The price is now testing the red resistance zone and the upper boundary of the 1H MSS (market structure shift) box. Scenario A (Bullish): — If BTC cleanly breaks the trendline and flips the 1H MSS box into support (with a strong close above), this is a trigger for a...
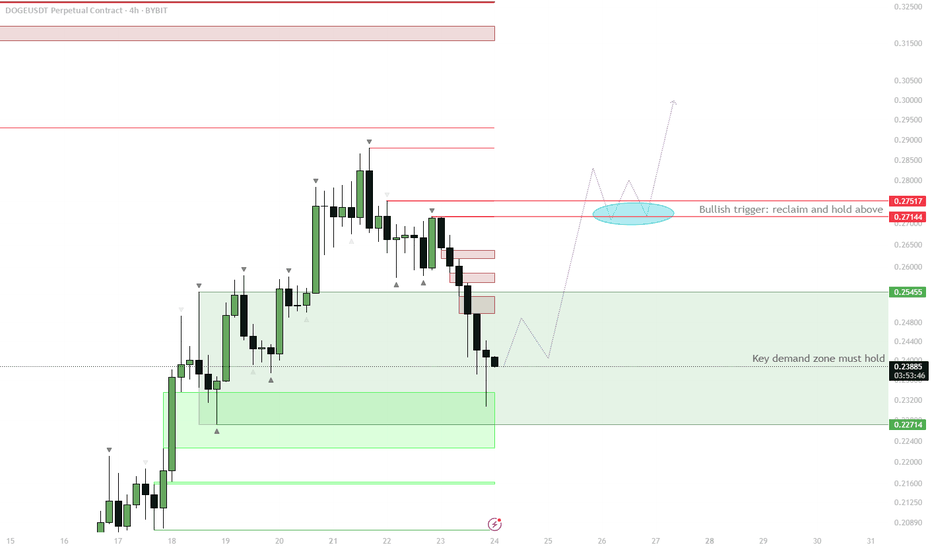
Price is currently testing the H4 demand zone (~0.227–0.254). Watch for price to reclaim the demand zone and close back above 0.254. If confirmed, expect a move up toward the red resistance cluster at 0.271–0.275. Consolidation above this area (highlighted in blue) would be a strong signal for continuation. Invalidation: clean breakdown and acceptance below...
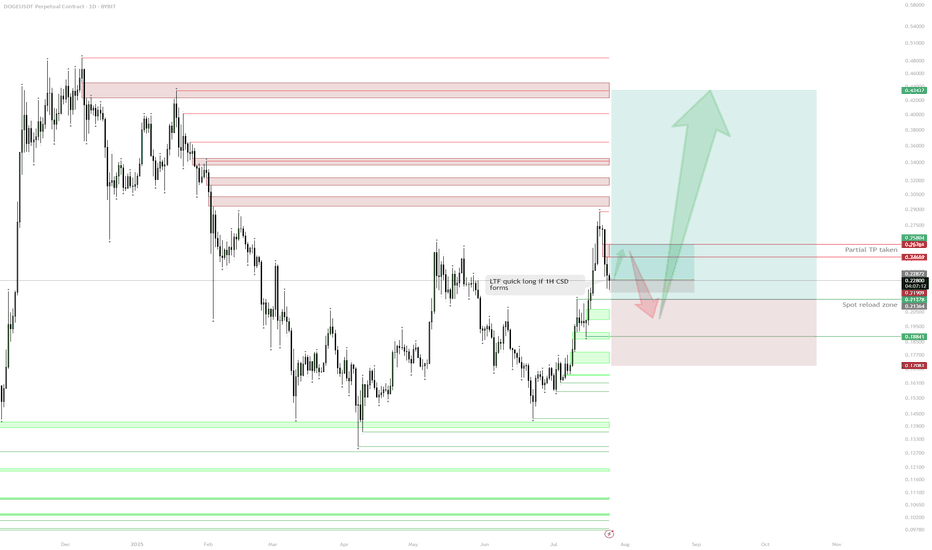
Spot Position & Realized Profit: Spot position held from the $0.19 sweep. Previous long from demand taken and partially realized at $0.26, de-risking the core position. Current Structure: After reaching resistance ($0.26–$0.27 zone), price is retracing. Daily demand/support sits around $0.20–$0.21, with multiple confluences for spot...
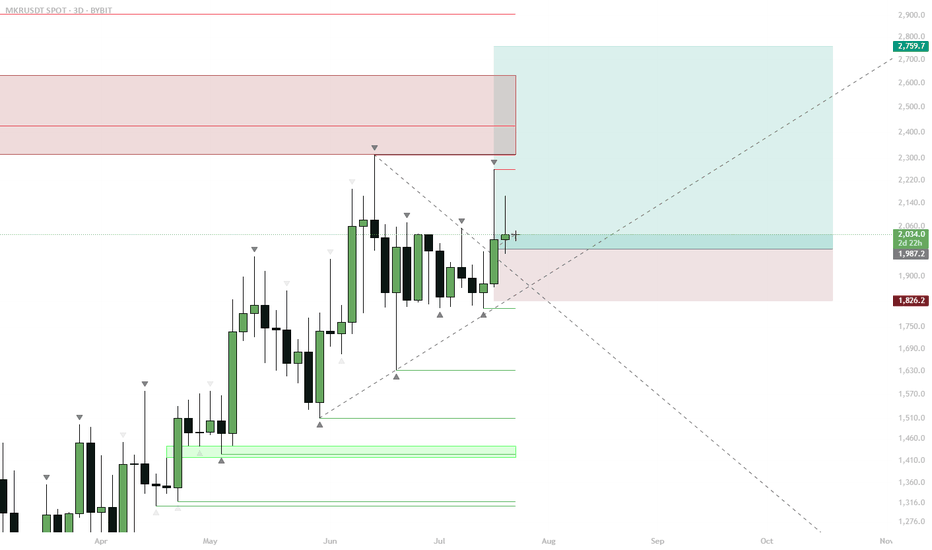
Breakout Confirmation: MKR has broken out of a daily bull pennant, signaling bullish momentum. The breakout candle reclaimed key HTF S/R (~$1987–$2000 zone) and flipped it to support. Entry and Risk Zone: Ideal long entries are on retests of this S/R flip ($1987–$2000). Invalidation below $1826 (recent low and support). Upside Target: First target at $2759, full...
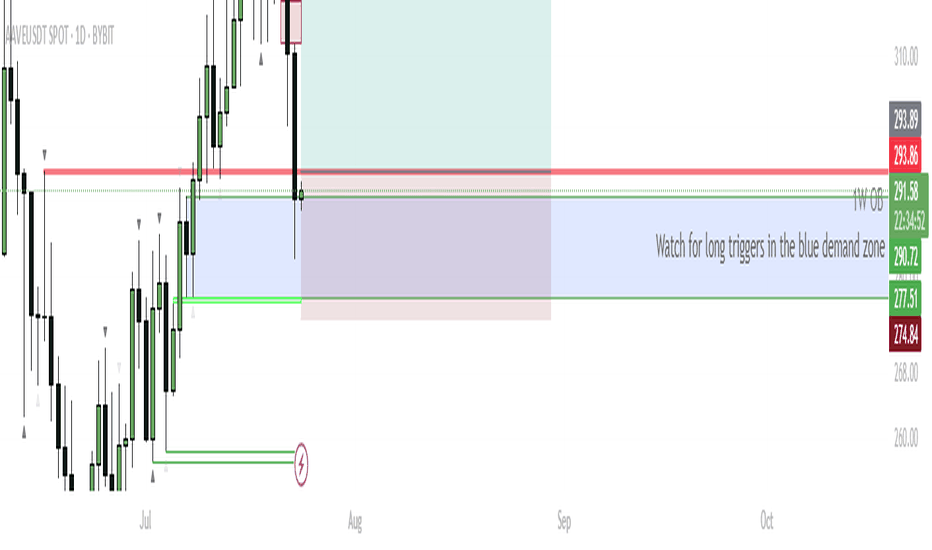
Current Structure: AAVE recently rejected from 1M S/R at $332.54 and pulled back into a confluence support zone—overlapping 1W order block (OB), 1D OB, and previous resistance now flipped support ($277–$290 zone, marked blue). Buy Zone: Watching the blue box area for bullish reversal triggers. This is a high-probability demand zone due to multiple timeframe...
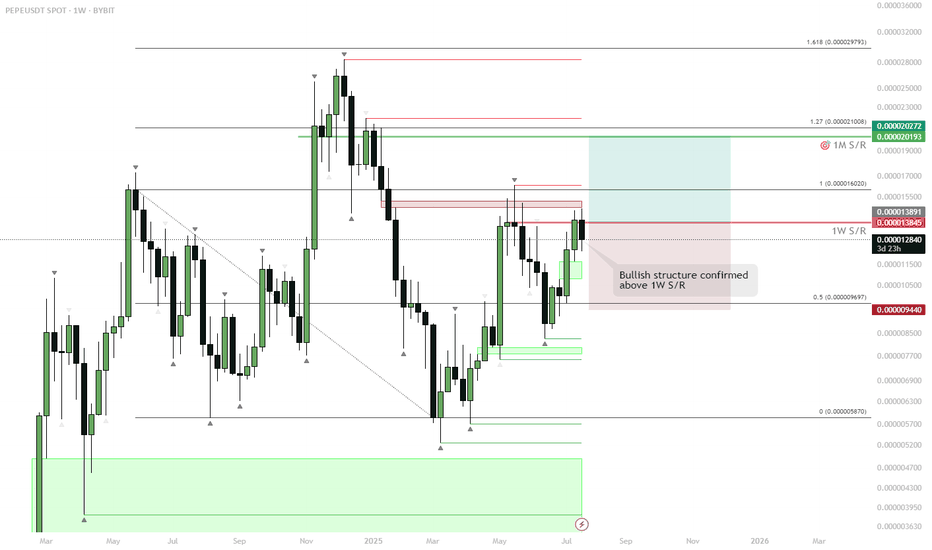
Major Breakout Level: Last week’s candle closed above the 1W S/R (~0.000013845), marking the highest weekly close in half a year. Bullish Structure: Price reclaimed and closed above a crucial weekly resistance. This flips the structure bullish, increasing odds of continuation. Next Targets: Immediate resistance lies near the 1M S/R (around...
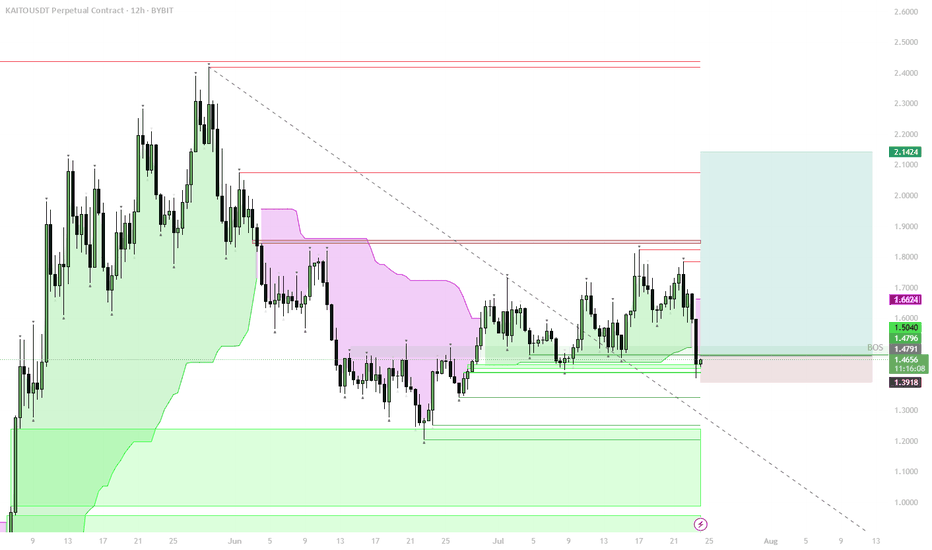
Structural Shift: Price reclaimed the key 1D S/R + BOS (Break of Structure) level, signaling a major trend change from bearish to bullish. Trend Confirmation: The move above $1.48–$1.50 zone confirms a bullish market structure. This level is now strong support. Accumulation Opportunity: The area between $1.65–$1.50 is ideal for spot accumulation, as it aligns...
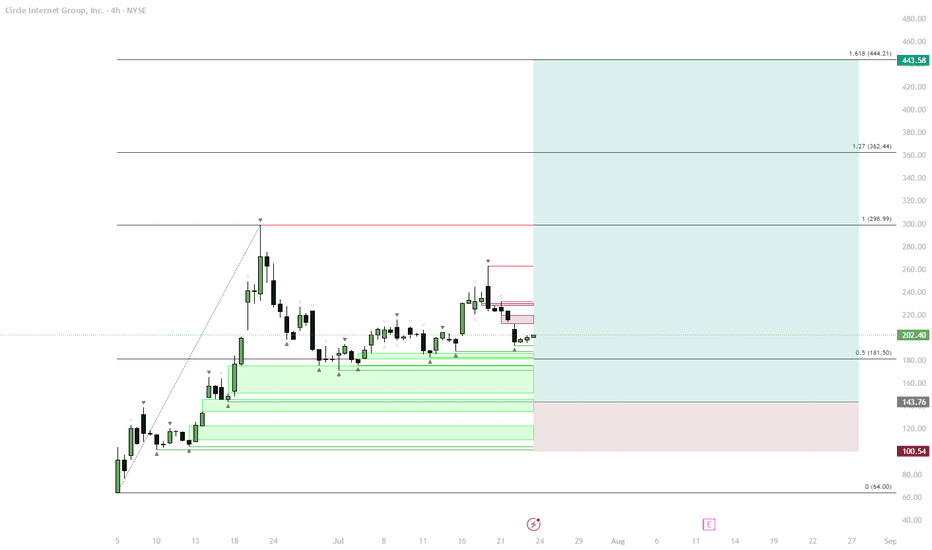
Initial Pump: Price launched rapidly after listing, forming a local high. Sideways Phase: Market settled into a sideways consolidation, typical after the first pump. Retrace: A retrace toward the 0.5 Fibonacci zone (~$181.50) is developing. Typical retracement in similar "crypto stonks" ranges from 60-80%. Accumulation in Demand Zone: Multiple support levels...
FLOKI has reclaimed the key horizontal support, forming a possible higher low. Currently watching the green box/range low for signs of accumulation (sideways price action) and support confirmation. If FLOKI establishes a range or shows strength at this zone, look for a long entry with stop below the range. Upside target is the range high and previous major...


